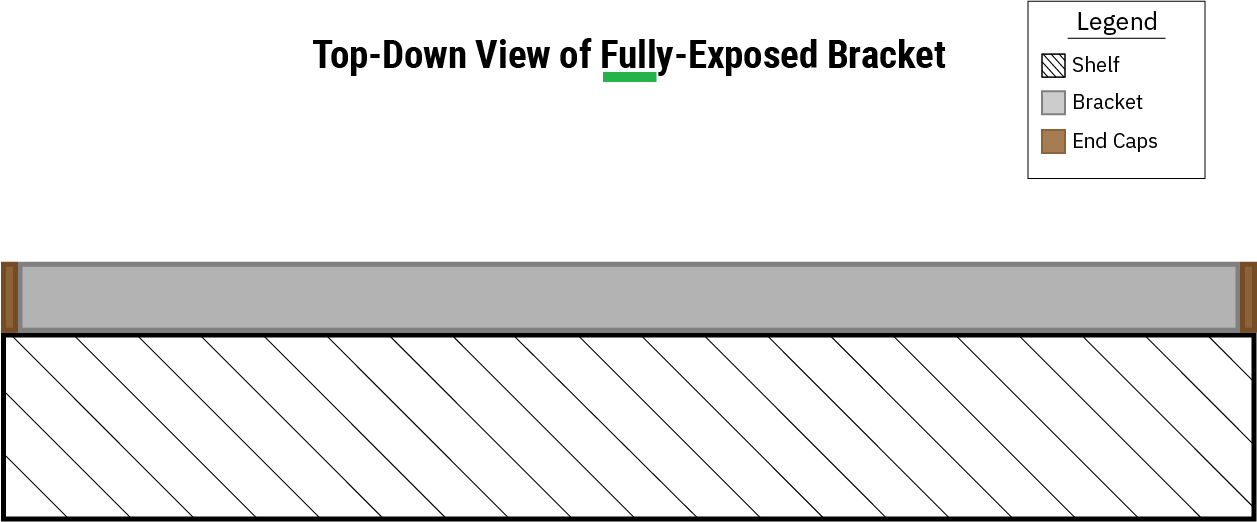
This is when the female bracket is not embedded or inserted into a channel in back of the shelf but instead installed directly onto the back.
You will still be able to see the bracket from the top and bottom once once the shelf has been installed to the wall as in the image above.
You may also want to paint the bracket to accent or conceal it against your shelf. You can learn more about painting the bracket here.
We always recommend you have your brackets on hand here before starting your project as there can be small variations in bracket length out of the box as the production cycle develops and parts are replaced. Measure twice, cut once!


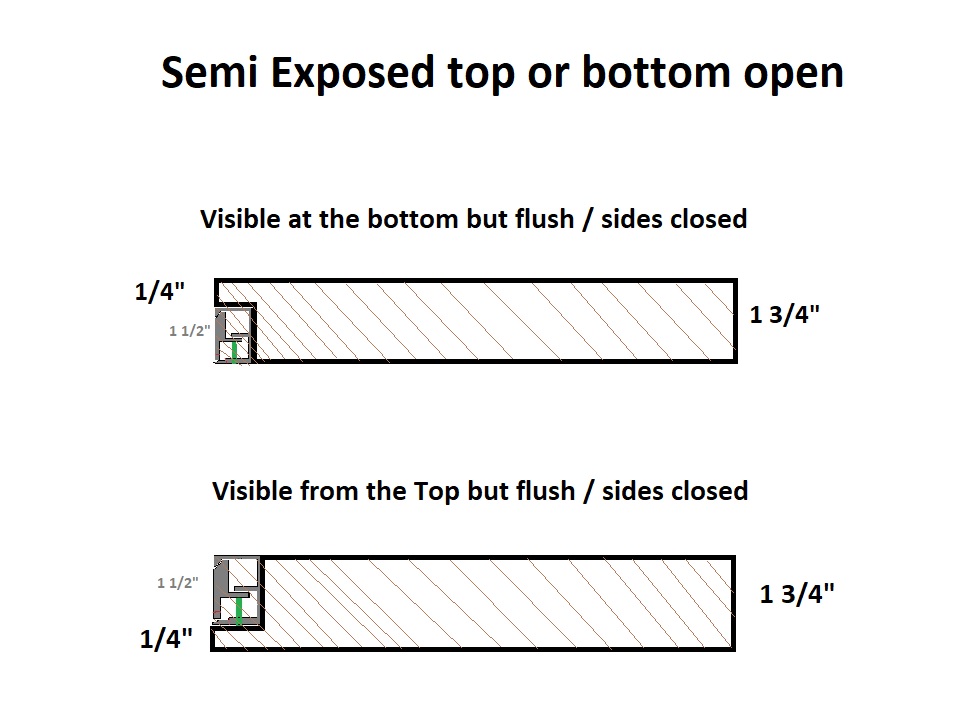
You may also opt for a semi-exposed bracket where the bracket is exposed on the top and bottom but surrounded by at least 3 inches of material on the sides.
With the exposed bracket, you will probably want to add end caps that are 3D printed from 1.75mm thick PLA material to the sides of the bracket once installed.
We find the easiest way to install these is when the set screw is not tightened yet. Insert the end caps, then tighten the set screws. This way your end caps will be snug and will not fall off. If they are a bit big, you can always file them down on the inside ledges.
Also note that the shelf will need to be approximately 1/8" shorter, since each end cap is 1/16" once attached - This will mean they are flush with the shelf once installed. The the male bracket will have to be 1" shorter as well, since the caps will not fit if the male and female brackets are the same length. We always advise you measure your brackets before starting your project as small variances can occur during production.

Note that these caps are 3D printed and can therefore be ordered in the color of your choice.
Fully exposed bracket tips and tricks:
When we install a fully exposed bracket, it may be the case that the bottom tip of the female bracket embeds itself into the drywall - especially if we put too much weight on the front of the shelf and there are not enough set screws used (we recommend using around 40% more set screws than standard in this type of installation to help mitigate this and avoid the shelf embedding too deeply into the drywall) or if they are not tight enough.

Normally we have end caps that prevent this from happening, since they are positioned flush with the wood on the sides and are not positioned outside.


However, if the end caps are too small or not positioned well, the only option that can prevent the female bracket from embedding itself into the drywall is to get a thin strip of wood or metal (3/16 tall and 1/16 thick) and slide it between the bottom tip of the female bracket and the drywall.
As a final alternative, you can also leave shelf material only above or only below if you are limited on shelf thickness. While this look isn't for everyone, it may be the solution for you if you are looking for a way to make the Classic bracket fit on very thin shelves.