As you might expect, it's very important to properly assess exactly how deep to make your channel in your shelf to accommodate the female bracket component when creating your Hovr shelves - too deep and you won't be able to connect your brackets, too shallow and your shelf will slant / not touch the wall. There are some key factors that need to be considered in each installation so let's get started.
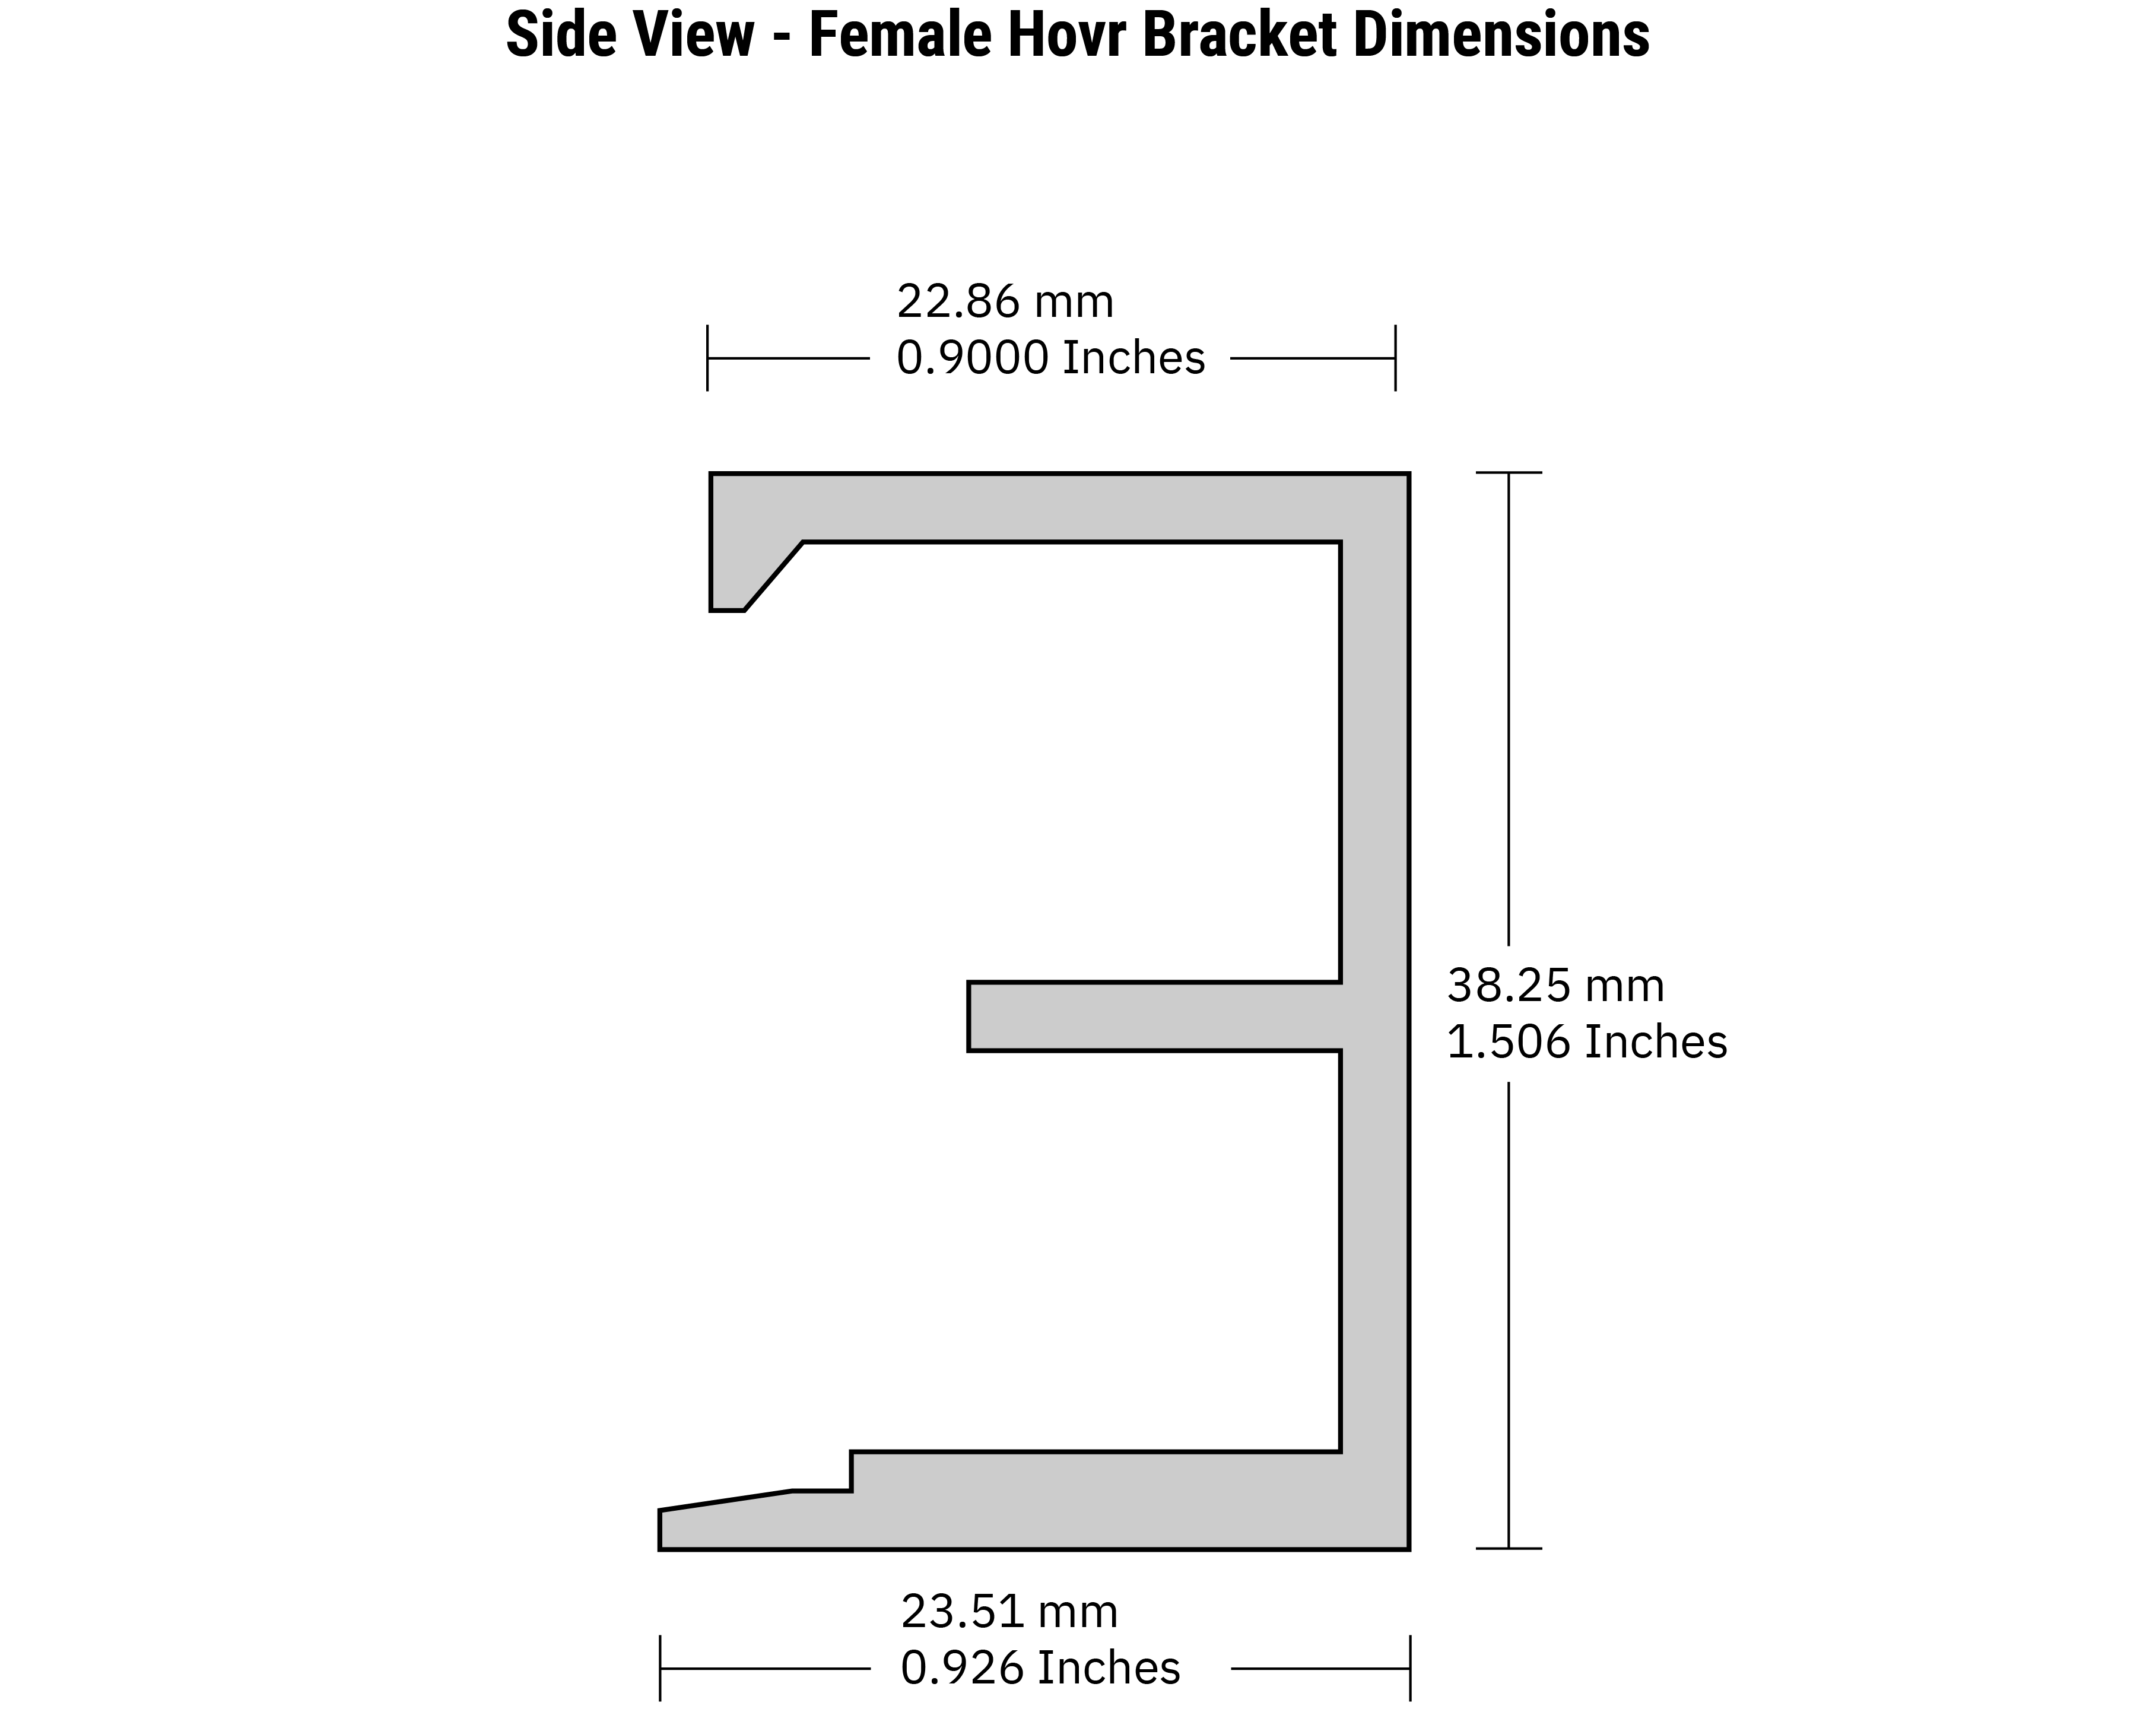
First of all, we need to know the dimensions of the female bracket, as the dimensions of the channel we will need to cut. You can see the key measurements in the diagram below for your reference. It's important to note that the bottom side of the bracket is ever-so-slightly longer than the top side. This is intentional, and performs an important function in some installations. However, depending on your walls, you may need to adjust your channel depth slightly. We'll go more into depth about that shortly. For now, take a look at the key measurements of the female bracket in the diagram below.
*Please note that as the production methods wear down and are replaced, there can be minor shifts in these dimensions through the production cycle. We ALWAYS recommend you have your brackets on hand and measure before you start cutting your shelf material.
So, we know the measurements to work around, but there is another factor at play here. Above, we mentioned the length difference on the top and bottom sides of the bracket - let's get into why that's there and why it matters.
In drywall installations (or installations with a softer wall material), the female bracket should be installed so that the top lip is flush with the back of the shelf, and the bottom lip protrudes about 1/64" past the back of the shelf. This is so this "fingernail" as we often refer to it, can bite into the drywall somewhat over time, and stabilize the shelf to assist in preventing it from rocking. See the diagram below for reference:

On the other hand in installations with a hard wall surface, such as with tile, you need to recess the bracket slightly further so that this time the bottom ledge of the bracket is flush with the back of the shelf and the top is slightly recessed. This is because, as you might assume, the hard surface of the tile has no give and a protruding fingernail would not be able to dig in, which would result in a slanted shelf. Again, see below for reference:
