Solid wood:
In order to use the system and have it concealed, you're going to want to create a space for the female bracket component inside the back of your shelf material. You can see the dimensions of the aluminum female bracket here but we ALWAYS recommend you have the bracket in hand before cutting your channel - this is especially true with the steel variant as it can vary significantly in size from project to project. You'll also need to think about what kind of wall material you are installing your brackets on to - depending on the hardness of the surface you'll want to recess the bracket slightly differently in your shelf (Click the following link to learn more about "The Fingernail" ).
Router:
Around half the time, the woodworker routers out the back according to the instructions given online in our Suggested Installation Guide.
If you're looking for a great resource on how to do this, Alex over at Backyard Resin made a video on how to build a jig and a full walkthrough of how to router your shelves that you can watch below:
Some key things to remember when using a router to make the channel:
1. Measure twice, cut once! When installing your shelf on a drywalled wall, make sure to measure the settings carefully. The type of wall you are installing onto matters: You want the top bracket lip to be flush with the back of the shelf for installs on soft material like drywall, or the bottom lip to be flush with the shelf if installing to hard wall materials like tile - this will ensure that your bracket is perfectly placed in the shelf. You'll want to ensure the top edge of the bracket is placed around 1/4" to a maximum of 1/2" from the top of the shelf, since you will need to be able to tilt your shelf in at 15 degrees when connecting it to the wall (a channel placed too low will mean the top of the shelf interferes with angling it into place).
2. Mark where you will be cutting your channel with a pencil before you start your cut. You want to leave at least 1/4" of material above and below the bracket channel (assuming a 2" thick shelf - Ideally, in a thicker shelf, you want the top of the bracket 1/4" from the top of the shelf so it can still angle into place).
3. Make multiple passes to cut the channel. This allows room for fine-tuning. In his video, Alex uses a 3/4" router bit to cut the 1.5" channel in two parts. You may find another bit works better for you.
4. Clear out and sand the channel for any extra debris / rough edges.
5. Check that the channel is the right fit for your bracket. Adjust as necessary. For more information on bracket placement on different wall materials, check out our article on "The fingernail" and female bracket placement, here.
6. Please always work safe.
Here's another example with a full length video we did clearing out the channel:
You may opt to skip the router only use a dado (North America only) or table saw blade to cut the groove that is needed to insert the female bracket. Here, you will need about 3" more room on the left- and right-hand end sides since the dado is a rounded blade and will leave a curve sloping upwards on the ends of your shelf that reduces available room for the bracket due to the slope.
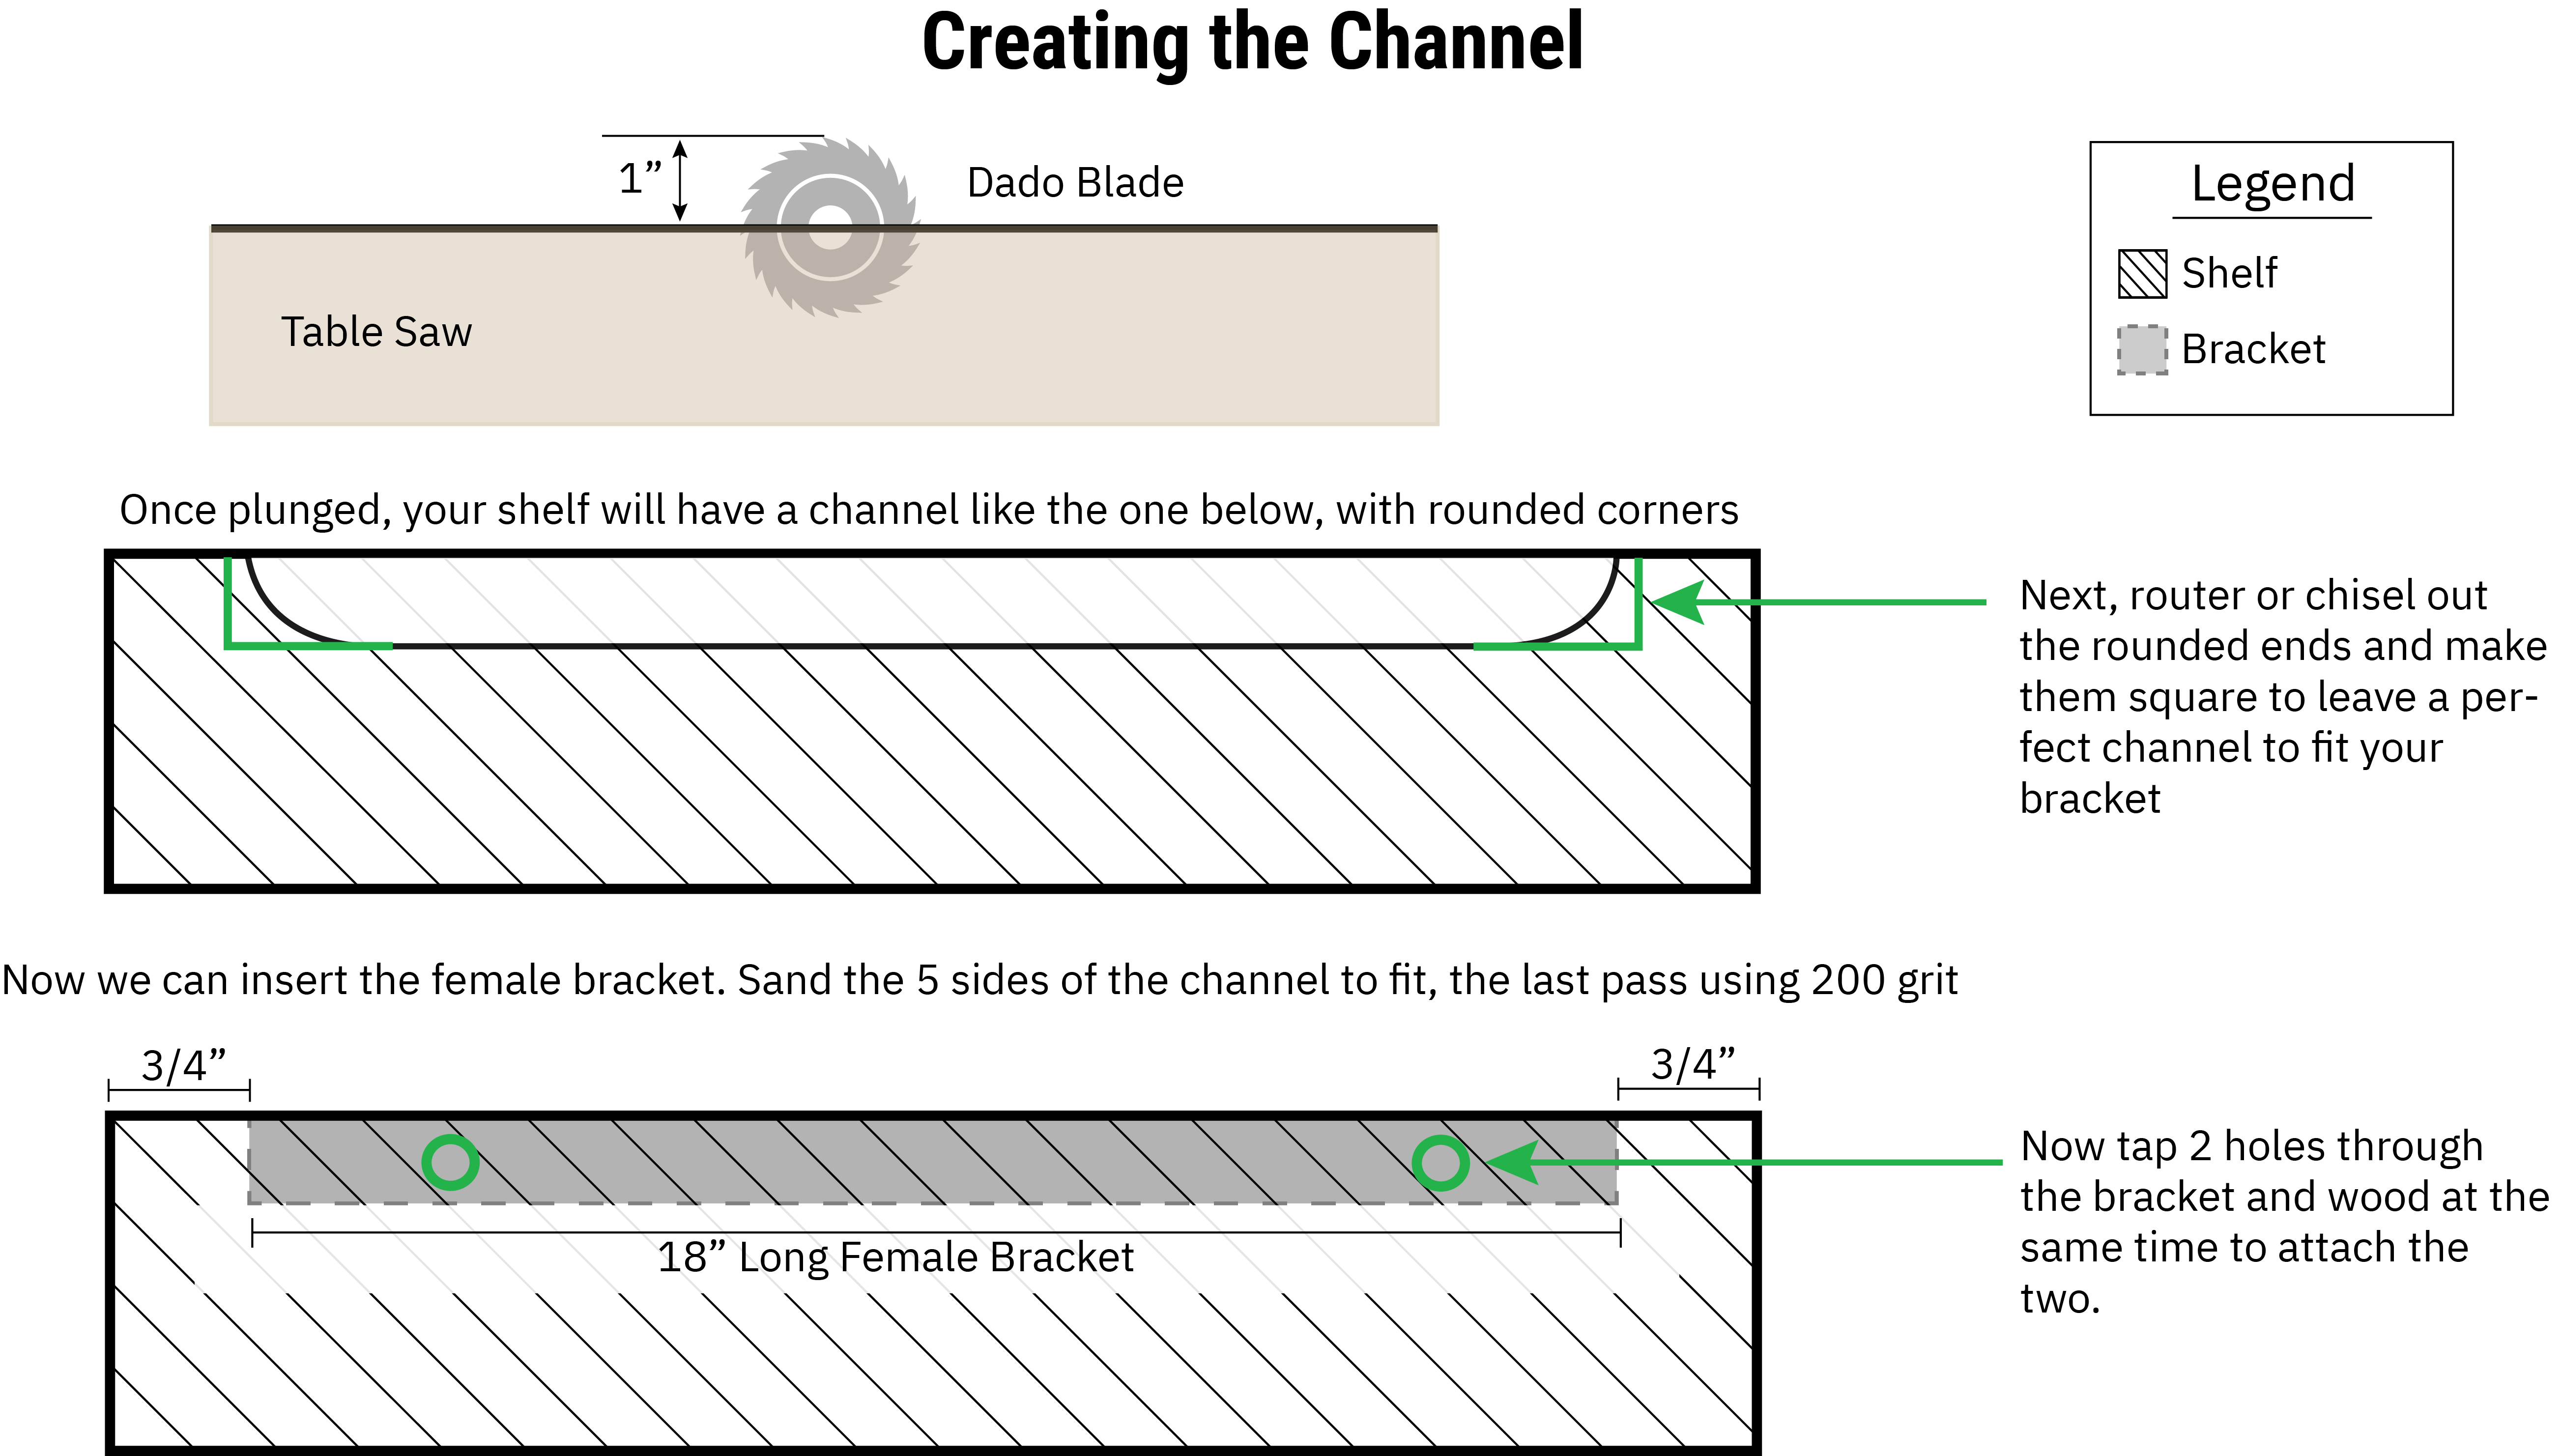
In the sample above, using an 18" bracket, a routered shelf needs to be at least 18" + 6" + (2x 3/4") = 25 1/2" long, whereas if you don't router out the edges, you are more limited to 19 1/2" in shelf length. Some do take the option of just chiseling the back out rather than using a router.
Now you are ready to install the female bracket into your shelf.
Caucus:
Some customers prefer to use this method, since they want to use different laminates on the shelf.
You build a caucus out of 1 1/2 inch wood (the same thickness as the female bracket), leave enough space to accommodate the female bracket, clad it with 3/16 plywood and laminate that, or choose the plywood you want to achieve the look they want.

You can even cover the plywood with leather or felt or whatever your heart desires.
Folding:
Some customers have a so-called thermal laminate. This enables them to cut grooves into the back of the MDF, then fold it to a shelf, glue in a backer board and attach the female bracket to that.

Note that here, you need very expensive machines.
This is just an example. If you are interested in this process, please contact us.