The female bracket comes with pre-drilled holes. However, if you cut it to length and realize that there is now a hole missing you can use a cobalt 3/16 drill bit and drill new holes where they are needed.
That said, remember you need to make sure that they are on the die line.
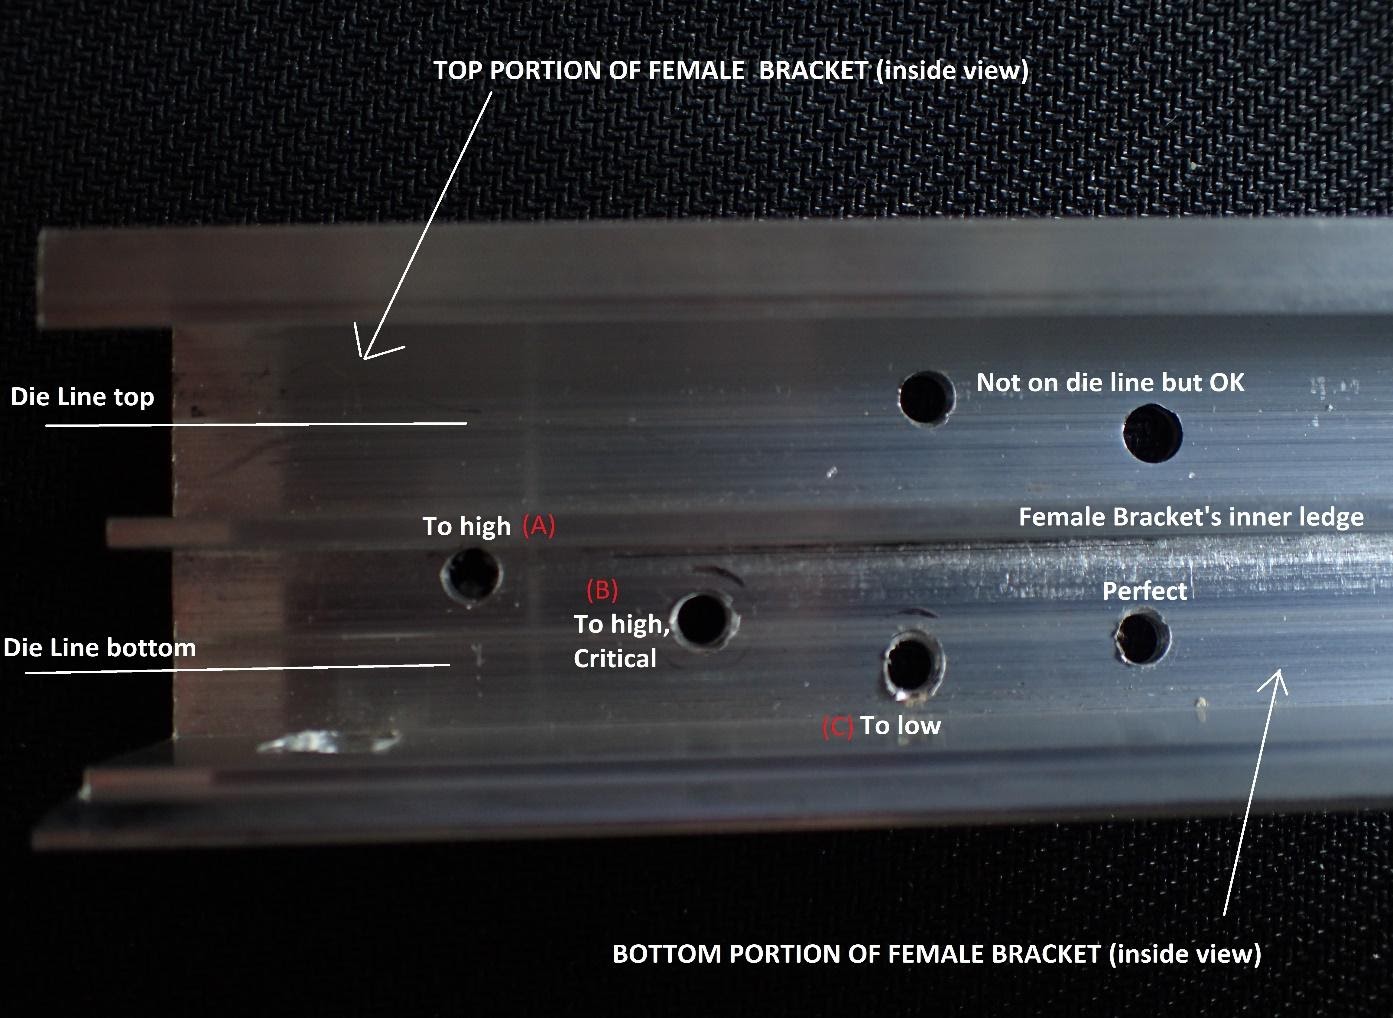
The upper portion is not as crucial. The bottom portion is extremely critical because If the new holes are not at the die line, the head of the screw may get in the way of the male bracket’s inner ledge when you put them together later on, stopping them from connecting correctly.
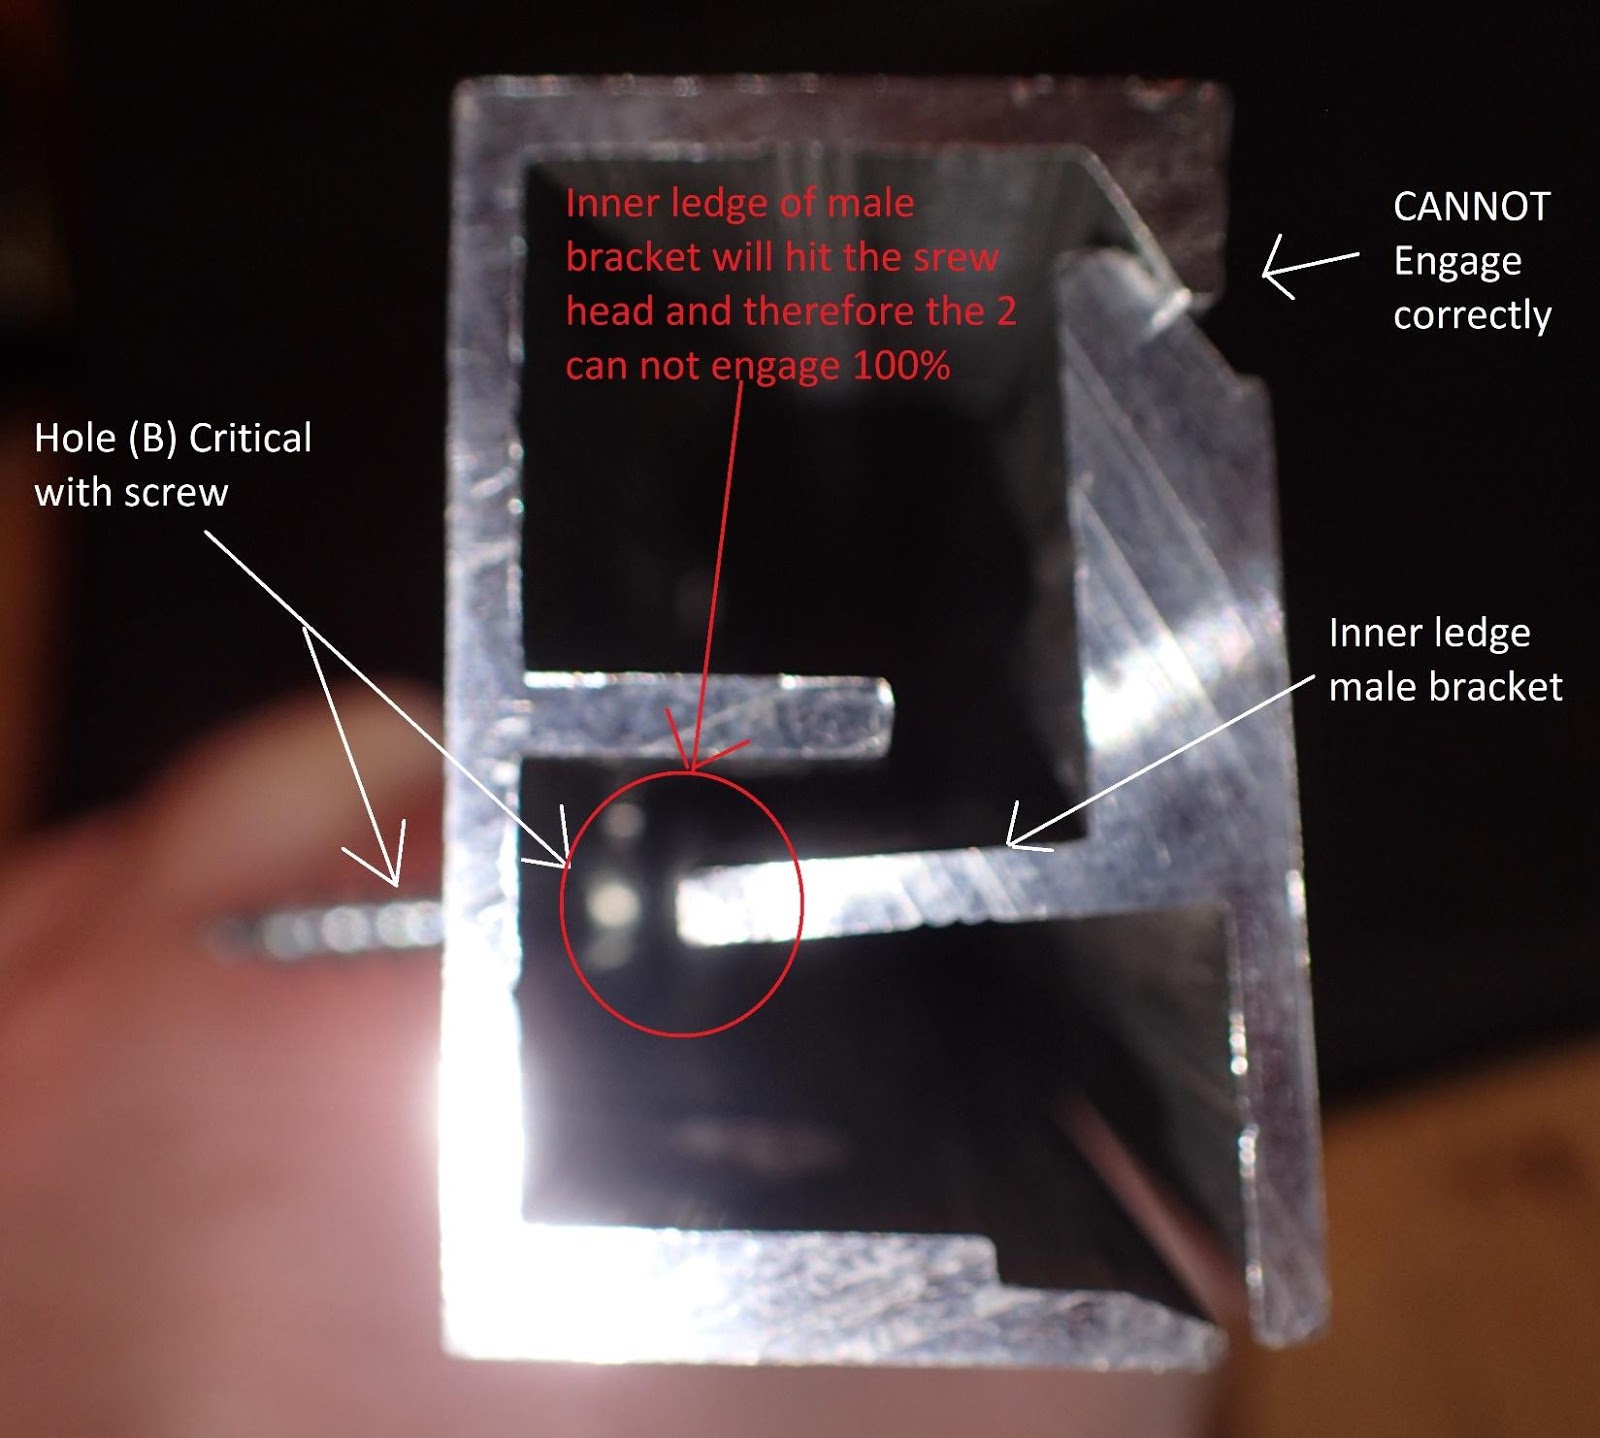
As seen above, If the new hole is drilled too high on the lower portion/bottom of the female bracket, the inner ledge of the male bracket will hit the head of the screw that is in the female bracket and the 2 components will not engage correctly.
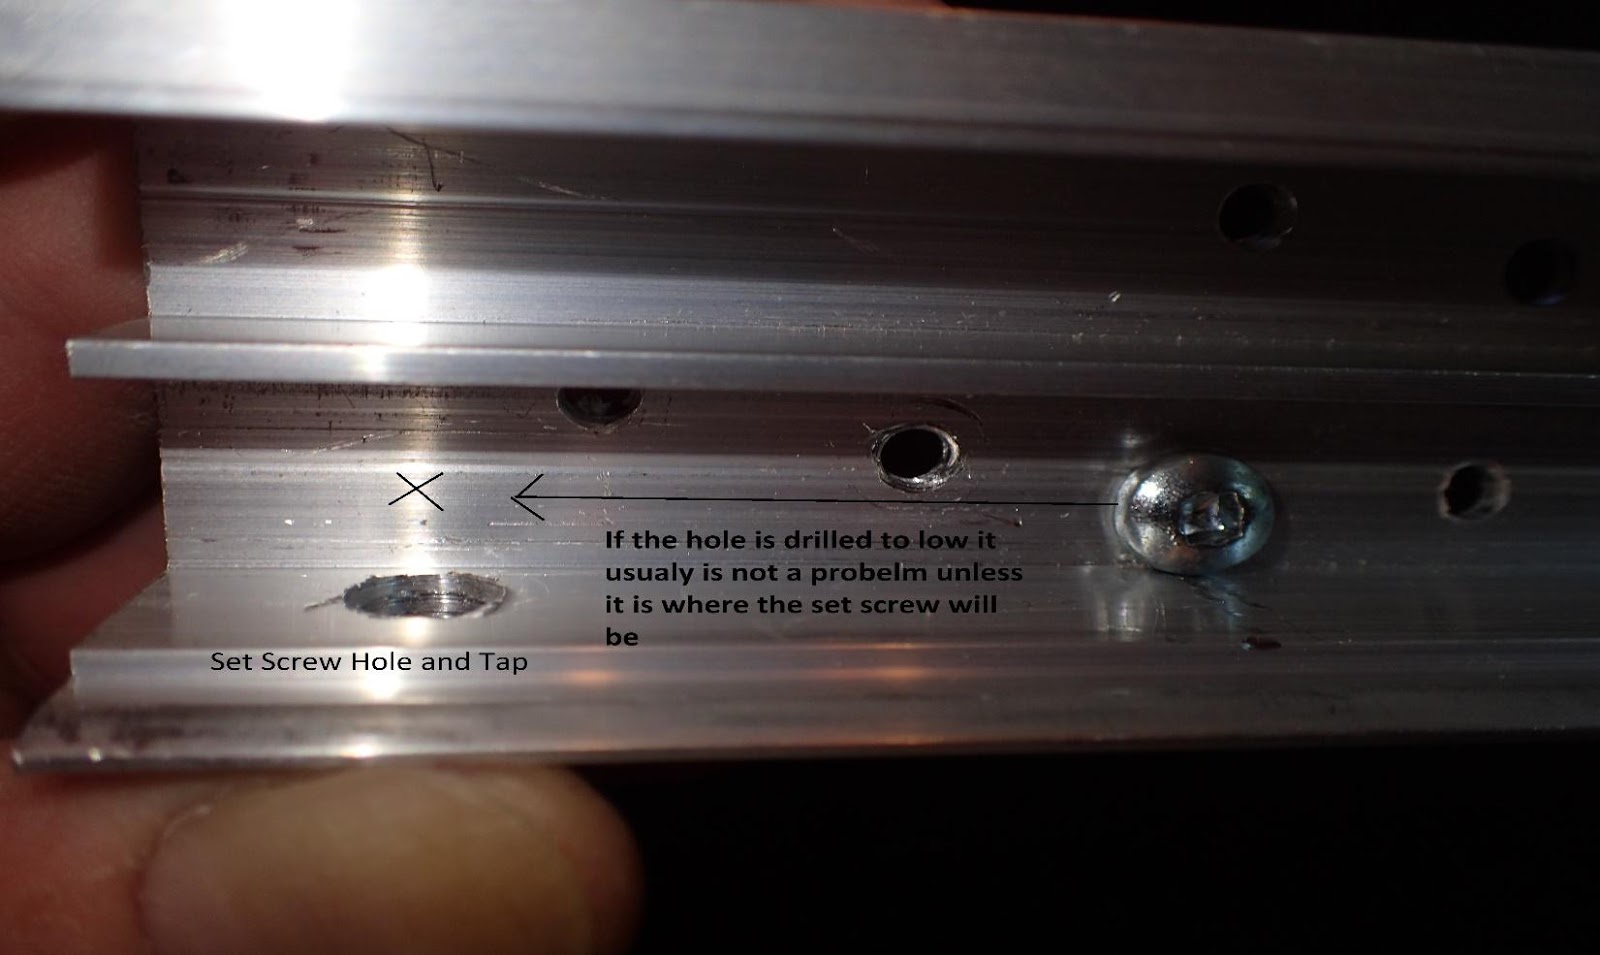
If the new hole is drilled too low, it should not be as much of a problem, as long as it is not directly in the path of where the screw will be coming in from.
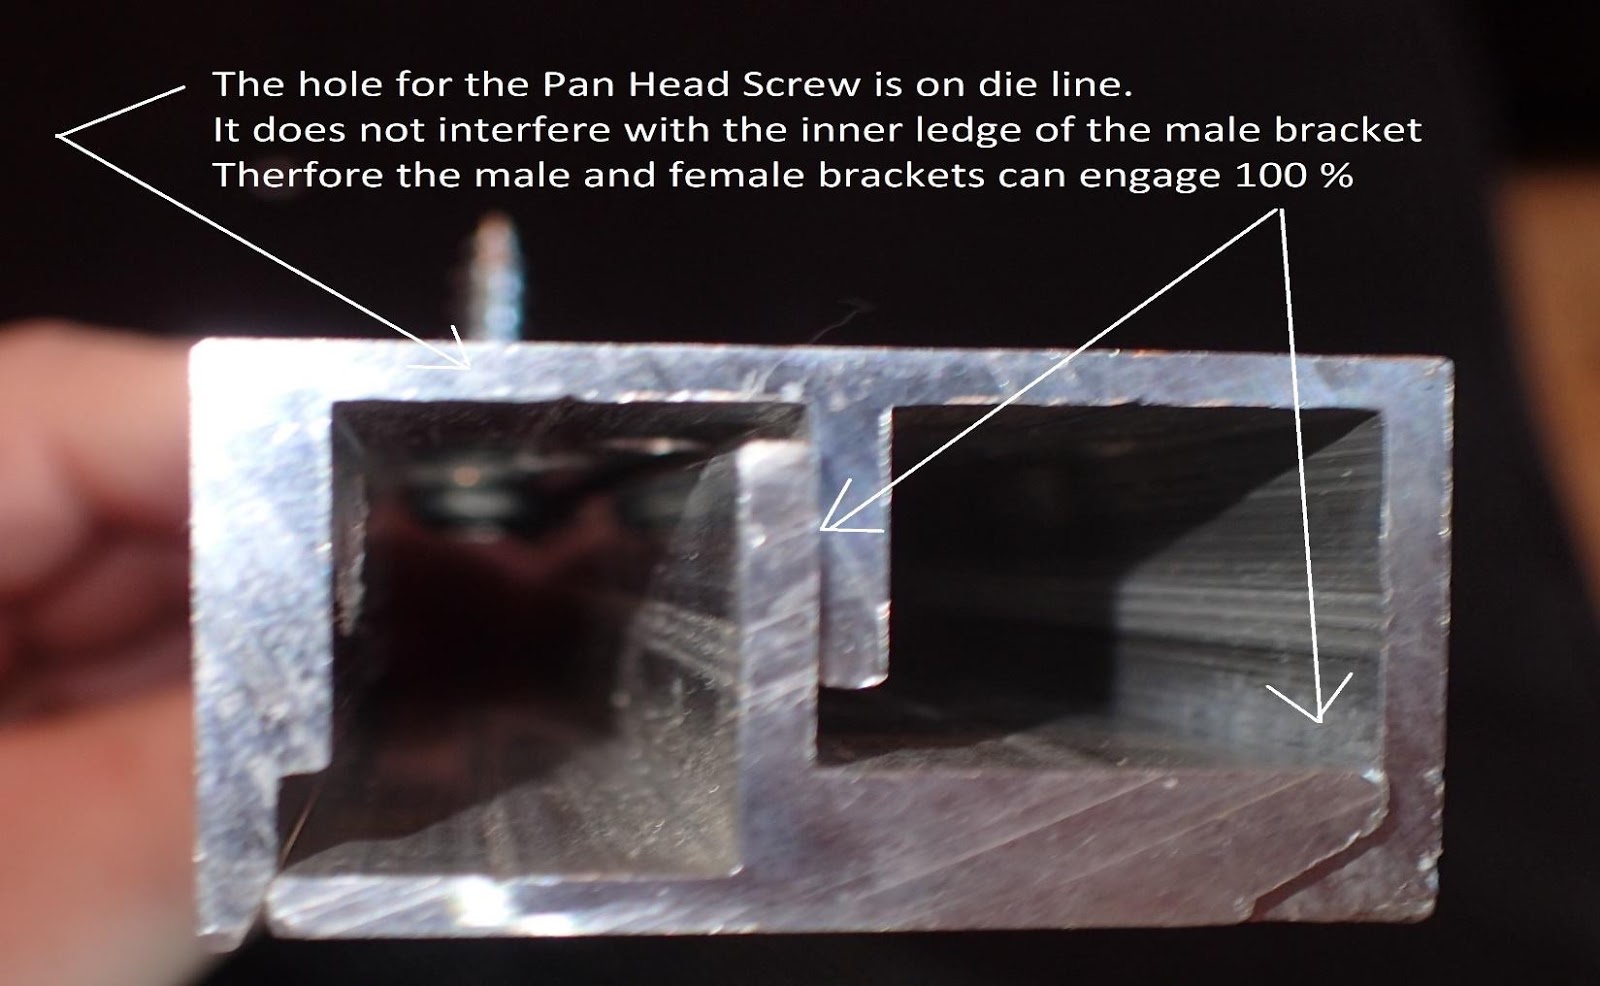
Below, you can see that if the holes are on the die line, the male and female can engage nicely.
When it comes to the male bracket, we do not pre-drill holes, since we can't guarantee or know where your studs are. This way you can drill holes to install your bracket precisely to fit your needs.
So how do you drill the bracket?
- Find the studs, mark the center of the stud on the wall.
- Hold the bracket level to the wall and transfer the mark from the wall onto the male bracket.
- Take a drill bit (3/16 is preferred) and drill 2 holes (top and bottom of the male bracket)
- Make sure you stay on the die line.
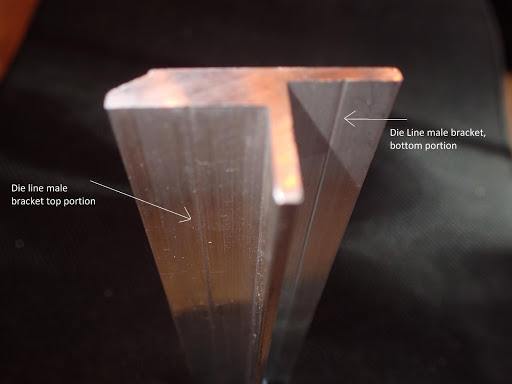
Congratulations, you can now attach the male bracket to the wall using 2 ½” long pan head wood screws. (2 studs = 4 screws / 2 for each stud)