When people talk about quartzite, it's very important to identify if it is real, natural quartz stone (such as onyx and others) or if it's what many people refer to as “quartzite” but it is actually engineered stone.
Engineered stone is basically granite and “real” quartzite stone dust mixed with lots of epoxy and pressed under heat back into slabs. This then commonly gets labelled as quartzite by many people.
Now, there is expensive high-quality epoxy, and the cheap low-quality epoxy. This is what makes the difference between cheap and expensive engineered stone.
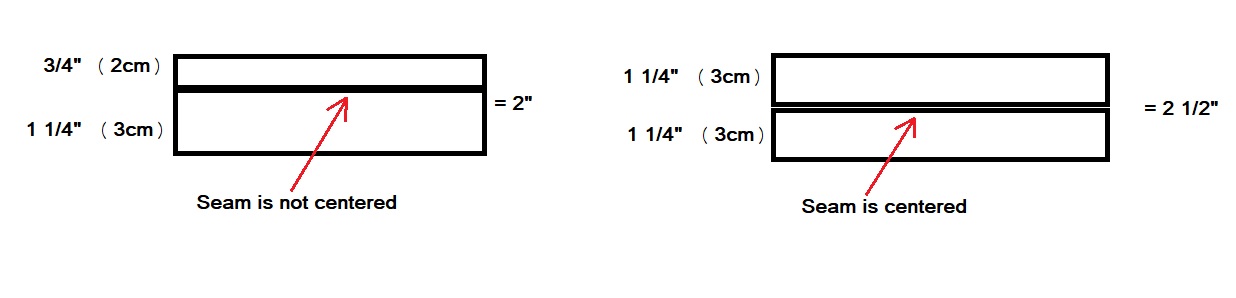
To demonstrate, we use the example of a recent customer's custom build. This engineered stone is just as heavy as granite but is man-made and comes in slabs of 2cm and 3cm. (3/4” or 1 ¼”). So for him to get it to 2 inches thickness is tricky, but a 2 ½” thick shelf looks better since the seam is centered.
Now if you were to use the aluminum bracket, ( 1 ½” tall) you would need to cut or router the back of the shelf (a chisel is not recommended here because the bottom of the channel would likely be way too uneven).
It's also worth noting that the seam is all around and will always be visible. If done by a pro, the seam can be almost invisible, but it WILL always be there.
Now, you can’t take the saw and go all the way through, like on a wood shelf, but to find a router and to clean up the left and right side so they are square is virtually impossible.
Most stone grinder blades are at least a 10 inch blade, so you have 3 inches on either side that is unavailable space for the female bracket.
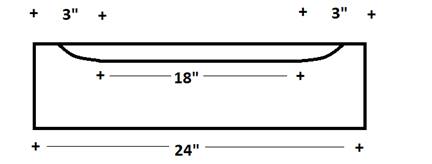
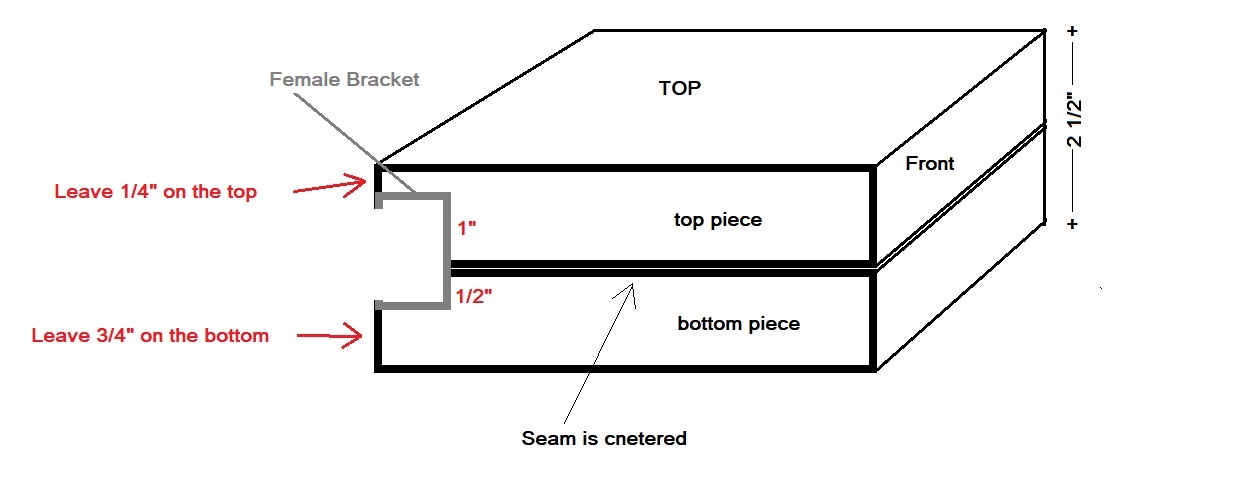
There are 2 possibilities for how to make a stone shelf. The first is that you cut out 1" of the top piece, and ½” of the bottom piece and glue them together. However, this can be very inaccurate.
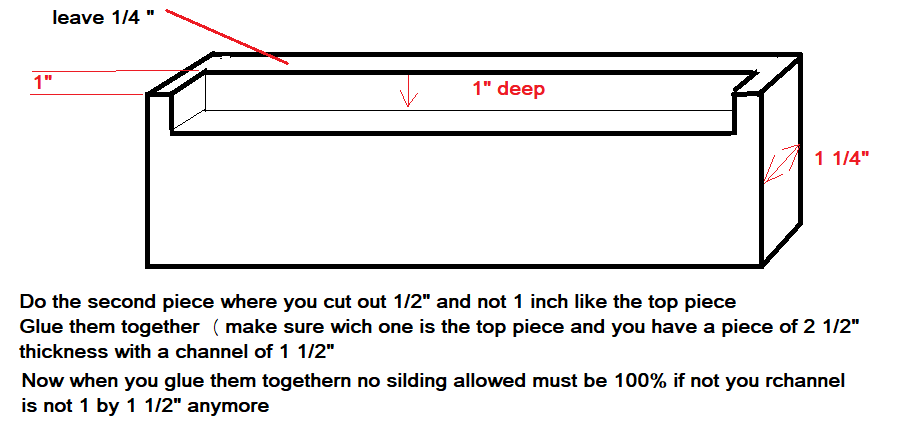
The second option, is one in which you glue the 2 pieces (a marble and granite shop, water-cooled table saw is required) together and then make a channel either with a hand-held grinder (again, quite inaccurate), or you clamp it down on the table saw and lower the blade (North America only: dado blades for granite do exist) into the back of the piece. This will take many passes and more than an hour for a professional granite shop to do, however, this is the best way.
Now we want to attach the bracket.
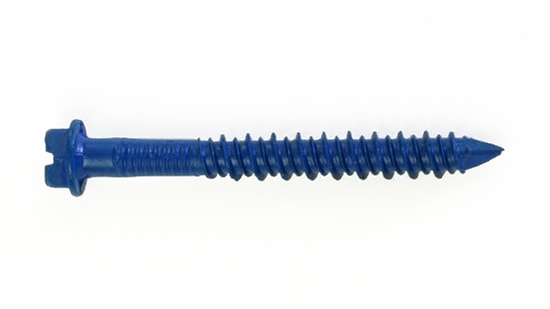
For that we need to drill holes into the bottom of our channel, where the female bracket has holes, and space them evenly. Using #10 or #12 Tapcon flat head screws (image below) 2 ½” long, meaning the holes that will be drilled need to be at least 2 ¾ Inches deep. Fill them with Surface Bonder Made by Integra and insert screws through the female bracket into newly Integra filled holes and let dry for 3 days.
Now when attaching the male bracket to the wall it is installed as usual, but the wall should 1) preferably be reinforced and 2) the male bracket needs to be attached with several screws to the wall. Two studs alone, even if we use the RSS GRK screws, may not be enough.
Depending on what you want to put on it and how deep the shelf is, more than 8 inches is not recommended in any case. It simply becomes too heavy. This is another reason why we have the steel bracket.
Now, it does not matter if you have real granite, quartzite / engineered stone, real quartzite or marble , or travertine, whoever makes the shelves has to use the appropriate glue epoxy from Integra. And each one is different for each different stone. If the wrong glue is used for the wrong material, it simply wont hold (for long).
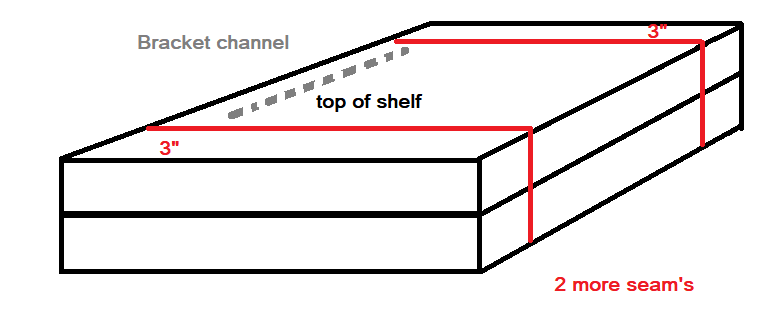
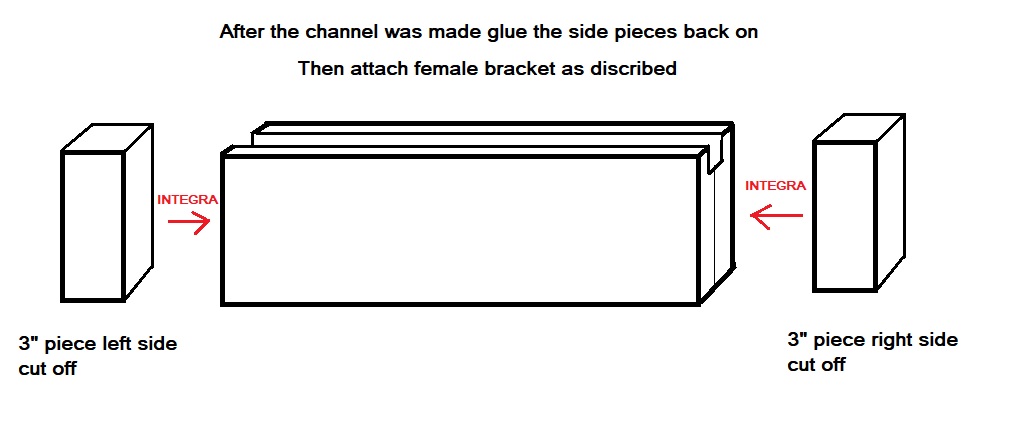
There is one more way, but this comes at the cost of 2 additional seams.
Glue 2 slabs together, cut of 3 inches of each side, make the channel and go all the way through with the blade, and glue the 3 inch side pieces back on.